Showing posts with label vegetarian. Show all posts

Monday, March 8, 2010

Day 67 - Mushroom, Leek, & Cauliflower Pot Pie


I may have mentioned that I checked Veganomicon out from the library. This is definitely a book that I want to own, however, so it is now on my wishlist. I've cooked (my version of) two recipes from it, and I love it. Great inspiration! I am sure the recipes are fine just as they are--I just can't seem to cook that way. It is very unusual for me to follow a recipe precisely (except when baking--that is imperative, although there are places there as well for creativity).

Anyway, this is my version of Isa's Cauliflower and Mushroom Pot Pie with Black Olive (Biscuit) Crust.

Mushroom, Leek, & Cauliflower Pot Pie

     Roux
  • 3 tbsp butter or margarine (depends on what you like and if you are vegan)
  • 4 tbsp flour
  • 2 cups milk (dairy, unsweetened almond, soy)
  • salt and pepper to taste
  1. Melt butter in small pot over medium heat. Add flour and whisk around until it is completely coated. It will be thick. Slowly add the milk, whisking the mixture as you add. Season with salt and pepper. Keep cooking over medium heat until the sauce is thick (and coats the back of a spoon). Remove from heat.
     The Rest
  • 1 small head cauliflower, stem removed, cut into small florets
  • 2 tbsp olive oil
  • 2 leeks, sliced and washed really well (leeks tend to hold on to sand!)
  • 12 baby carrots, diced
  • 1/2 lb cremini mushrooms, sliced
  • pie crust (see note below)
  1. Heat the oil in a large saucepan over medium heat. Add the leeks and carrots and saute until crisp-tender. Add the mushrooms and cauliflower, and cook until mushrooms release their liquid and it mostly evaporates. Remove from heat and pour in sauce, stirring to coat vegetables well.
  2. Prepare pie crust. Place one pie crust in bottom of a deep dish pie plate. Add vegetables and sauce. Top with remaining pie crust. Crimp edges.
  3. Bake in a 350° oven for 35-45 minutes (until top is golden brown). Remove from oven and let cool for 10 minutes (this will help keep the pot pie together when you cut it).
*Note: Pillsbury pie crusts, and most likely your store brand purchased pie crusts are made with lard. Unfortunately that means that the easiest way--purchasing a prepared pie crust--is not vegetarian. You may be able to find veg pie crust someplace like Whole Foods or Trader Joes. Or you can just make your own--they are really pretty easy.

 
Yup..it's kinda messy, but,ooooohhhhhhh soooooo goooooood!

Saturday, February 20, 2010

Day 51 - Cream of Potato and Asparagus Soup

This recipe is totally based on a recipe from Vegan with a Vengeance. But way easier. Cuz that's how I roll. There aren't many ingredients, but it makes a soup that is absolutely spectacular. And one that I ate all the leftovers the next day (not all at once! Throughout the day!). Yum. It really is that good!

Cream of Potato and Asparagus Soup
  • 3 lbs potatoes
  • 2 lbs asparagus
  • 8 oz sour cream (choose vegan or not--I used regular)
  • salt and pepper to taste
  • milk (unsweetened almond, soy, or dairy) if you need it to thin out the soup
  1. Peel the potatoes. Cut into 1-inch pieces and place in large pot. Cover with water. Cook 15-20 minutes, or until potatoes are tender.
  2. Meanwhile, cut asparagus into 1-inch pieces. When potatoes are almost tender, add asparagus and cook until tender.
  3. Using an immersion blender (or in batches in a blender if you don't have an immersion blender), blend potatoes and asparagus together until creamy and light green. If you are my mom, you prefer it more chunky--but I like the creaminess of it almost all mushed together.
  4. Add sour cream and blend in. Add salt and pepper to taste.
  5. IF you need to thin the final product out some, add milk until soup reaches your desired consistency.
This has a wonderful asparagus flavor. Yum! Sorry, no pics! It was so good it didn't last long enough for pictures...

Saturday, February 13, 2010

Day 44 - Zucchini Pizza


Did I ever tell you I used to be a professional baker? Yep, I did. I've always loved to bake and when times got tough I was hired at the local grocery store in the bakery. I worked my way up (very quickly, I might add) from being a "packager" to actually becoming a baker and eventually assistant bakery manager.

I love to bake.

My kids didn't really like it when I worked at the bakery though because I never baked at home. Now I'm a full time/part time writer and I have a lot more time on my hands. Developing recipes and such. :) For Christmas I purchased a book by Jim Lahey called My Bread. It's a book that gives you the basics of no knead bread. Lahey's hypothesis is that bread has been around forever, so it couldn't have been as hard to make as it is today. One of the many things I learned when I was a professional baker is that bread that has a longer time to develop (in the refrigerator--it slows the rising) tastes better, and Lahey's bread tastes awesome. Lahey includes a no knead pizza dough recipe as well, and some great veggie versions (and some vegan as well) of different pizzas.

Here's what happened: I mixed up the dough (about 5 minutes between classes). Set it in a bowl on the stove for about 2 hours. At around 5:30 I put the boys to work. They shredded zucchini, salted it, and drained it. And they stretched the dough into the pizza pans. And put on the toppings. And baked the pizza. I supervised. And the pizza was AWESOME! I don't think we'll be buying pizza anymore for our Friday pizza nights...

Jim Lahey's No-Knead Pizza Dough
  • 3 3/4 cups bread flour
  • 2 1/2 tsp active yeast
  • 3/4 tsp salt
  • 3/4 tsp sugar
  • 1 1/3 cups water
  1. In a bowl stir together the dry ingredients. Add the water and mix until blended. This dough is stiff, not wet and sticky (just in case you are used to Lahey's other recipes). Cover the bowl and let sit at room temperature for around 2 hours.
  2. Oil two 11x13 jelly roll pans. Use half the dough for each pan. Gently pull and stretch the dough to fit the pan, using your hands to press it evenly out. Pinch any holes together.
Stretching the dough may take some time. Here is an example for you:


The topping:
  • 3 large zucchini
  • 1 1/2 tsp salt
  • 8 oz grated swiss cheese
  1. Preheat the oven to 500°F. Grate the zucchini. In a medium bowl mix together the salt and the zucchini. Let stand for 15 or so minutes, until the zucchini has released its water.
  2. Drain the zucchini in a colander, and squeeze the zucchini to get out as much water as you can.
  3. Spread the zucchini mixture over the dough. Top with the shredded swiss cheese. Bake for 15 minutes or so, until the topping starts to turn golden brown and the crust is pulling away from the sides of the pan.
Can I just say...YUM!!!

*Disclaimer--the boys pretty much did all the work (and all the eating). Even taking pictures. I took the video and (kind of) supervised, but this was really pretty much all them. They even decided on the topping!

Tuesday, February 9, 2010

Day 40 - Super (Bowl) Veggie Chili

You will never be able to tell the difference! This recipe is a mix between this recipe at All Recipes and this recipe by Rachael Ray. The goal was to come up with a perfect chili that NO ONE would realize was vegetarian. I think the key to that are the veggie crumbles, which, unfortunately, are not a staple at my local grocery store (did I mention that I live in a really small town?). But I had one package in the freezer that I picked up on my last trip to Vegas. And when I went to the local grocery, I discovered some more in the freezer case.

Whitney's Super (Bowl) Veggie Chili
  • 1 tbsp olive oil
  • 1 medium onion, chopped
  • 3 tbsp ground cumin
  • 2 stalks celery, chopped
  • 1 red bell pepper, de-seeded and chopped
  • 1 green bell pepper, de-seeded and chopped
  • 1 jalapeno pepper, de-seeded and chopped
  • 4 cloves garlic, chopped or pressed
  • 1 (4 oz) can diced green chiles, or whole green chiles, diced
  • 2 (12 oz) pkgs vegetarian burger crumbles
  • 2 (28 oz) cans crushed tomatoes
  • 1 (15 oz) can crushed tomatoes
  • 1 (15 oz) can diced tomatoes
  • 1/4 cup chili powder
  • 1 tbsp ground black pepper
  • 1 (15 oz) can red kidney beans, drained
  • 1 (15 oz) can white beans, drained
  • 1 (15 oz) can black beans, drained
  1. Heat olive oil in a large pot over medium heat. Stir in the onion and garlic, cook until translucent. Mix in celery, and peppers. When vegetables are heated through, mix in the vegetarian crumbles. Cover the pot, and simmer for 5 minutes.
  2. Mix the tomatoes in the pot. Add chili powder and pepper. Stir in drained beans. Bring to a boil and reduce heat to low and simmer for 45 minutes.
Sorry, no picture. Everyone was too involved in the game and the chili was gone before I could take a pic. :)

Sunday, February 7, 2010

Day 38 - Pizza!

Pizza seems to be a theme at our house. Lately we've been getting it every Friday (may have something to do with having a houseful of teenage boys every weekend). On Thursday we made our own, though. Steven loved it, but we have some picky eaters amongst the teen crew...so I don't know how well it would have gone over.

A Very Veggie (and Hummus) Pizza
  • 1 loaf of frozen wheat bread dough, thawed
  • 1 (8 oz) container of hummus
  • 1/2 large tomato, thinly sliced 
  • 1 tsp italian seasoning
  • thinly sliced red onion
  • 3/4 of a 15 oz can of artichoke hearts, drained well
  • 1/2 cup sun dried tomatoes packed in oil, drained well
  • fresh spinach
  • 3/4 cup mozzarella cheese
  1. Preheat oven to 375°F.  Roll out bread dough to desired thickness (ours ended up being about 14" round).
  2. Scoop several tbsp of hummus over bread dough and spread into a thin layer (this is a substitute for the pizza sauce). Sprinkle Italian seasoning over hummus.
  3. Place thinly sliced tomatoes over hummus. Place spinach over tomatoes, and place remaining ingredients over spinach. Top with mozzarella. Bake 18-20 minutes, or until pizza crust is completely cooked.
This was really yummy. I used to work in a bakery and the master baker would make a similar version to this pizza. But instead of any sauce at all, he would use the tomatoes on the bottom. They were so thinly sliced that they would end up making their own sauce. I can never get my crust as crispy as his, but I attribute that to the fact that he always used these awesome french bread pans for his pizza. They have tiny little holes in them that allow the hot convection air to really touch almost every part of the bread dough. The best I can do is my pizza stone, which works, but it still isn't quite the same...

 
Note my tomatoes are in the wrong position but that is because they were an afterthought.
Don't forget to put them on yours. I promise they make the best sauce! 

Tuesday, January 26, 2010

Day 26 - Awesome Mushroom Pasta

Have I mentioned yet how much I love mushrooms? I could eat them every day. I love them as much as I love steak, which is good since I've given up eating meat. Ü

Rachael Ray 365: No Repeats--A Year of Deliciously Different Dinners (A 30-Minute Meal Cookbook)
This week I'm cooking my way through a bunch of Rachael Ray recipes. A lot of them are easy to adapt to vegetarian cooking, and this recipe is no exception. This is based on Rachael's Creamed Mushroom Sauté with Artichoke Hearts, Spinach, and Penne from 365: No Repeats.

Of course, I put my own spin on things, but the basic recipe is so easy and soooooo good!


Whitney's Pesto Mushroom, Artichoke Heart, Spinach Pasta
  • 4 tbsp olive oil
  • 4 garlic cloves, pressed
  • 2 shallots, finely chopped
  • 1 1/2 lbs assorted mushrooms, thinly sliced (we used white button mushrooms and cremini mushrooms)
  • salt and pepper to taste
  • 3 tbsp flour
  • 1 cup vegetable broth
  • 1/2 cup unsweetened almond milk (soy would probably be fine, too)
  • 1 (15 oz) can artichoke hearts, well-drained
  • 1 (10 oz) box frozen spinach, thawed and squeezed dry
  • 1 tbsp prepared pesto
  1. Cook pasta according to package directions.
  2. Heat a large skillet over medium heat. Add olive oil. Add garlic and shallots and cook for about 1 minute. Add mushrooms and cook, stirring frequently, until browned and yummy.
  3. Sprinkle flour, salt, and pepper over mushrooms and stir. Stir in vegetable broth and cook for a minute or two (until thickened). Stir in almond milk and simmer for five minutes.
  4. Stir in artichoke hearts, spinach, and pesto. Heat through (1-3 minutes). Mix into well drained penne pasta.


The finished pasta is soooooooo good!

Monday, January 25, 2010

Day 25 - Mac n Cheese n Cauliflower

This recipe came about as kind of an amalgamation of what I had and what sounded good and this recipe from Rachael Ray. The taste was pretty good, but I think the sauce got to hot on mine when I was making it, because it started to separate.

Mac N Cheese N Cauliflower
  • 1 lb penne pasta
  • 1 head of cauliflower, cut into florets
  • 1 tbsp olive oil
  • 2 tbsp butter
  • 1 small onion, finely chopped
  • 3 tbsp flour
  • salt and pepper to taste
  • 1 1/2 cups milk
  • 1 cup vegetable broth
  • 1 lb Gouda cheese, grated
  1. Cook pasta according to package directions. Add cauliflower florets during the last 3 minutes of cooking.
  2. In a medium saucepan over medium heat, add the olive oil and the butter. Add the onions and cook for about 3 minutes. Add the flour, salt, and pepper and cook for about 2 more minutes. Add the milk and vegetable stock and cook until sauce starts to thicken.
  3. Stir in Gouda cheese, until melted and creamy. Add drained pasta and cauliflower. Yum!
Apparently I didn't take pictures of this dinner. Sorry about that!

Tuesday, January 19, 2010

Day 19 - Eggplant Parmesan


The grocery store had some lovely eggplants on sale, and I picked up a couple. Especially because I love eggplant. I mixed a couple of eggplant parmesan recipes together to come up with this one, which was quite tasty, and utilized the cheese that I had (which was a little bit of a lot of different cheeses).

Eggplant Parmesan
  • 2 large eggplants
  • salt
  • 2-3 tbsp olive oil
  • 1/2 cup Parmesan cheese
  • 1/4 cup Italian style 6 cheese mix
  • 1/4 cup Mexican mix cheese
  • 1 (16 oz) jar spaghetti sauce
  1. Line two baking sheets with aluminum foil. Trim the eggplant and slice into 1/4-inch thick slices. Salt the slices generously and stand upright in a colander to drain for 30 minutes.
  2. Preheat oven to 500°. Rinse eggplant slices under cold water and pat dry.
  3. Lightly brush each side of eggplant with olive oil and place on prepared baking sheets. Bake in oven until the eggplant is golden, 15-20 minutes. Remove from oven and reduce oven temp to 350°.
  4. In the bottom of a 9 x 13-inch pan, spread 1/3 of spaghetti sauce. Layer 1/2 of the eggplant slices in the bottom of the pan. Sprinkle with half of the Parmesan cheese and the Italian cheese.
  5. Spread 1/3 of spaghetti sauce over eggplant layers. Layer remaining eggplant slices over spaghetti sauce. Sprinkle remaining Parmesan cheese over eggplant slices. Spread remaining spaghetti sauce over eggplant. Sprinkle with Mexican cheese mix. Bake in oven for 30 minutes.

Friday, January 8, 2010

Day 8 - Minestrone Casserole

I didn't actually cook this last night. We ate leftovers and I went to Book Club. But I did make this last January for my Dinner Club swap. Sadly, we are no longer swapping dinners...but that is probably ok since I have sworn off meat this year.

I wonder if I can get anyone to swap vegetarian frozen meals with me?

This is a really good recipe. And one I've been thinking I need to make again. I love having meals in the freezer for those nights when I forget to take my vitamins am tired and not in the mood.


Minestrone Casserole

  • 2 cups uncooked mini lasagna noodles (4 oz) -I used something called Wacky Mac from the local grocery
  • 2 tbsp olive oil
  • 1 cup chopped onion (1 large)
  • 1 cup sliced carrots
  • 2 medium stalks celery, sliced (1 cup)
  • 1 medium bell pepper, chopped
  • 1 medium zucchini or summer squash, quartered lengthwise and slice-1 used a small one of each
  • 2 cloves of garlic, chopped (I pressed)
  • 2 cans (15 oz each) red kidney beans, drained and rinsed
  • 1 can (15 oz) diced tomatoes with Italian herbs, undrained
  • 1/2 cup finely shredded parmesan cheese, divided
  • 1 teaspoon salt (oops! forgot this)
  • 1/4 tsp pepper (forgot this too)
  • 1/4 cup refrigerated basil pesto

1. Heat oven to 350 degrees. Cook and drain pasta as directed on package using minimum cooking time.
2. Meanwhile, in large skillet, heat oil over medium heat. Add onions, carrots, celery, and bell pepper; cover and cook 5-8 minutes, stirring occasionally, until carrots are just tender. Uncover; stir in squash and garlic. Cook and stir 1 minute more.
3. Place pasta in uncreased 3-qt casserole. Stir in carrot mixture, beans, tomatoes, 1/4 cup of the cheese, salt, pepper, and pesto. Cover casserole. Bake 40 to 50 minutes or until hot in center.Top each serving with remaining cheese.

How I freezerized it: Place 2 cups uncooked pasta in a quart sized ziploc bag. Place 1/4 parmesan cheese in a snack sized ziploc bag. Cook vegetables as directed. Remove from heat. Stir in undrained tomatoes, beans, salt, pepper, and pesto. Place in a gallon sized freezer ziploc bag. Place all 3 bags in another gallon sized ziploc bag. Freeze.

This recipe is from one of those little Pillsbury cookbooks you can pick up each month at the grocery store. Not sure which one, but I am pretty sure that's where I got it.

Wednesday, January 6, 2010

Day 6 - Zucchini Corn Enchiladas


For whatever reason, in the middle of winter, zucchini is abundant (and cheap) at the Mexican market close to my husband's work. And since we love zucchini, he has been bringing it home for me to cook. We've already had stuffed zucchini, zucchini parmesan is on the horizon, and last night I created a zucchini enchilada dish.

Which is muy sabrosa.

Zucchini Corn Enchiladas
  • 2 medium to largish zucchini
  • 1 small onion
  • 2 cloves garlic, pressed
  • 1/2 of a 16 oz bag frozen corn
  • 1 (4 oz) can diced green chiles
  • 12 (6-inch) corn tortillas
  • 1 (10 oz) green chile enchilada sauce
  • 1/4 cup mexican cheese mixture (optional)
  1. Preheat oven to 350°. Shred both zucchini.
  2. In a large saucepan over medium heat, saute onions until translucent. Add garlic, corn, and shredded zucchini. Cook until zucchini has released water and water has mostly evaporated. Stir in diced green chiles.
  3. Place tortillas on a microwave safe plate and cover with a paper towel. Microwave on high for 1 minute to soften.
  4. Place a scant 1/4 cup of filling in each tortilla, rolling up. Place seam side down in 13x9 casserole pan. Sprinkle any remaining filling over the top of the rolled tortillas.
  5. Pour enchilada sauce over the top of tortillas, making sure that the sauce covers all the enchiladas. If using cheese, sprinkle over the top of the enchiladas.
  6. Bake for 25-30 minutes, or until enchiladas are heated through.
The cheese is really an unnecessary addition to these enchiladas. I don't even really like cheese, but my family does. This plays lip service to that want from them...but it really is an unnecessary addition. :)

And while I haven't frozen this particular recipe (I only made one), I am pretty sure that this would freeze just fine. I would have made two, but I wanted to have zucchini left for the zucchini parmesan that I am making tonight...

Tuesday, January 5, 2010

Day 5 - Pizza!


I keep forgetting to take my vitamins. Which is stupid, because I have no energy when I don't take them (my body tends to be extremely anemic--resulting in occasional blood transfusions, which really sucks). So, in the afternoon I have almost no energy, which makes it really hard to cook dinner.

And that means I have to punt. Which is what I did last night. We went to the store and picked up a large cheese pizza. Which my son can eat at any given time. Our deli is kinda sparse on the cheese, which on the one hand annoys me, since I pay the same price for a cheese pizza as I would for a supreme with the works--$12.49, but on the other hand is kind of ok since I don't really love cheese.

Steven wanted just cheese, so half of the pizza I left plain. The other half, though, I dressed up with olives, fresh mushrooms (did I tell you how cheap mushrooms were? $2.59/lb plus they were HUGE), and sun-dried tomatoes (oh, my favorite). I stuck it in the oven (425°) for 15 minutes, and voila...perfect pizza.
Yes, that is a pumpkin pie in the corner. It is Steven's
favorite and about the only sugary dessert I will let
him have now that he has braces on.

Monday, January 4, 2010

Day 4 - Stuffed Mushrooms


On Sunday we went shopping and came home with some great stuff--fresh blueberries (which have been awesome in my cereal with almond milk) and grapes.

And I still have mushrooms in the fridge because I haven't gotten to them. I sauteed my spinach in hopes that it would end up in my (non-existent) pierogies, but it just got put in the fridge when I gave up on them.

So, I had some beautiful large mushroom caps and sauteed spinach. And a hankering for something meaty...

Stuffed Mushroom Caps with Sauteed Spinach
  • 15 large mushroom caps
  • 1 tbsp olive oil
  • 1 bag of baby spinach (mine came from the farm, so I am guess that it was 12-14 oz), sauteed
  • 2 small onions (shallot size), chopped
  • 5 cloves of garlic, pressed
  • salt and pepper to taste
  • a sprinkling of Parmesan cheese (optional)
  • 1/8 cup bread crumbs
  1. Preheat oven to 425°. Remove stems from mushroom caps. Place caps gill side down on foil line baking sheet. Roast in oven until juices start to release from mushroom caps, about 20 minutes.
  2. While mushrooms are roasting, chop mushroom stems and cook over medium heat in olive oil til juices release. Add chopped onions and garlic. When onions are translucent, add sauteed spinach and heat. Remove from heat and add bread crumbs, salt, pepper, and Parmesan cheese (if using).
  3. Remove mushroom caps from oven and turn over. If you have an excess of moisture from mushrooms, you can add it to your stuffing mixture. Using a tablespoon, distribute stuffing mixture evenly between mushroom caps.
  4. Bake in oven an additional 10 minutes. Yum!

Sunday, January 3, 2010

Day 3 - Homemade Gnocchi

So after I put that pierogi dough away (or threw it away--which is what really happened), I remembered that I still had mashed potatoes in the refrigerator. My goal was to make pierogies for dinner and then have extra for the freezer. And that will happen. Today. Or tomorrow. Or this week. If it kills me. But with the darned dough that always turns out but is such a pain to work with. ;)

But I needed a quick, easy dinner because DH and I lingered around like lazy people in bed all day watching tv (dh) and reading (me). This is partly because my living room had been taken over by teenage boys, and while I love them, they are kind of loud and rowdy, and I was in a quiet type of mood.

But I digress.

Food. Teenage boys get hungry fast. And while my son is on board with the whole vegetarian for a year thing--he often eats that way anyway--I wasn't sure how the others would fare. So I needed something quick and filling. And I had those mashed potatoes in the fridge. So some quick thinking came up with the gnocchi.

And as I pulled out my favorite recipe for gnocchi, I realized that the gnocchi recipe is almost exactly the same recipe as my pierogi dough recipe. Which explains A LOT. That dough is great for little potato pillows...but it doesn't roll out well--it is just too sticky.

So here is the basic gnocchi recipe. Which is really, really easy. You should try it.

Homemade Gnocchi
8 servings

  • 3 cups cold mashed potatoes
  • 2 eggs
  • 1/2 tsp salt
  • 3 cups flour (you can use a little more if it is too sticky, but it probably won't be...my mashed potatoes are always almost solid when they are cold and a 1:1 ratio of potatoes to flour works well for me)
  1. In a large pot, bring a potful (Ü) of water to a boil. In a medium bowl, combine potatoes, eggs, and salt. Mix well. Add flour and mix until dough begins to form into a ball. Turn dough out onto a lightly floured countertop. Knead lightly until smooth.
  2. Divide dough in half, and divide each half into 6 equal portions (I find this easier to do in 2 batches). Roll each portion into a 1/2-inch thick rope. Line each rope up next to each other (leave about 1/2 an inch in between each rope).
  3. Using a pizza cutter, cut each log into 3/4-inch pieces, forming little pillow shaped dumplings.
  4. Carefully drop gnocchi into boiling water. Once gnocci rise to the surface, cook 2 minutes. Drain and serve with your favorite marinara sauce.
Pampered Chef has some extra sauce ideas that I will share, well, because they are quite yummy. We used pasta sauce that I canned last summer for last night's gnocchi, though. And those boys pretty much ate it all. And the one who doesn't like tomatoes gobbled his up with butter, salt, and pepper. Success!

Homemade Gnocchi Cooking Away on the Stove

Gnocchi with Walnut Pesto
  • 1/2 recipe homemade gnocchi
  • 1/4 cup walnuts
  • 1/2 cup lightly packed fresh basil leaves
  • 1 tbsp olive oil
  • 1 garlic clove, pressed
  • 1/4 tsp salt
  • 1/4 tsp coarsely ground black pepper
  • 1/4 cup grated fresh Parmesan cheese
  1. Place walnuts in a microwave safe dish. Microwave, uncovered, on high for 1-2 minutes, stirring after each 30-second interval. Cool completely. Chop walnuts and basil together. Combine basil mixture, oil, garlic, salt, and pepper in a small bowl.
  2. Add pesto to cooked gnocchi; mix gently. Spoon onto serving plates. Sprinkle parmesan cheese over gnocchi.
Gnocchi with Sage Brown Butter
  • 1/2 recipe homemade gnocchi
  • 1 tbsp olive oil
  • 1 tbsp butter
  • 3 tbsp snipped fresh sage leaves
  • 1/4 cup grated fresh Romano cheese
  • Black pepper
  • Additional sage leaves
  1. Heat oil and butter in a large saucepan over medium heat. Add sage and cook 1 minute or until butter just begins to brown. Add cooked gnocchi. Cook without stirring 4-5 minutes or until gnocchi are golden brown on one side.
  2. Remove from skillet; spoon onto plates. Top with grated cheese, black pepper and garnish with additional sage.

Gnocchi with Homemade Pasta Sauce

Saturday, January 2, 2010

Day 2 - French Onion Soup

Well, on the 1st I got a bit frustrated. I was planning on making cottage cheese and spinach pierogies, and mushroom pierogies, but the dough recipe I was using was tooooooo sticky. I ended up putting it away because I was getting so frustrated, and we had leftover soup instead. This is a pretty basic recipe--onion soup in the crockpot.

This is adapted from Robin Robertson's "Fresh from the Vegetarian Slow Cooker".

I love onion soup, but I hate to stand there and cook the onions. It takes forever...like an hour! Who has time for that (well, me...but that's another story)?

Robin slices hers into the slow cooker and pours olive oil on them. I made a couple of minor changes to her recipe, and this is what I came up with:

  • 6 large yellow onions (sweet onions are best, such as Walla Walla or Vidalia, if you can get your hands on them)
  • 1/4 - 1/2 cup olive oil
  • salt and pepper
  • 4 (15 1/2 oz) cans vegetable stock
  • 2 tbsp vegan Worcestershire sauce (or use this recipe, this recipe, or this recipe)
  • 6 slices french bread
  • 6 slices provolone cheese

  1. Slice ends off of onions and remove papery skin. Slice in half from root end to top, so that when you slice, the rings will already be cut in half. Slice each onion and place in slow cooker.
  2. Pour olive oil over onions (use however much seems appropriate to you--I used the lesser amount and the onions were fine). Place lid on slow cooker.
  3. Cook on high heat for 4-6 hours, stirring occasionally, until onions are soft and well caramelized.
  4. At this point, I removed half of the onions and placed them in a marked freezer bag. That is so the next time I want soup, all I have to do is add the stock.
  5. Add vegetable stock and Worcestershire sauce. Cover and cook on high an additional 30 minutes to an hour.
  6. To serve, ladle the soup into ovenproof ramekins. Place a slice of french bread and provolone cheese on top of the soup and place under the broiler until the cheese is melted. Alternatively, place bread slices and cheese on a baking sheet and put them under the broiler. When cheese is melted, remove from oven and place in a bowl of onion soup.
We got about 6 servings from this.

Friday, January 1, 2010

Day 1 - Black Bean Enchiladas

Of course it is the New Year, and things are fresh and exciting! Hopefully things will stay that way throughout the year. :)

I haven't decided what I am making for dinner yet, but I am sure it will have spinach and mushrooms as I have both of those items in the fridge. The spinach was grown locally at our local high school farm. This is near and dear to my heart, and something I am happy to support.

So as I plug in my ingredients to Google, I will leave you with a favorite vegetarian recipe of mine--Black Bean Enchiladas. I made two meals of this earlier this week and stuck one in the freezer. Yum!

Black Bean Enchiladas

1 tbsp vegetable oil
1/2 cup chopped onion
1 tsp ground cumin
1 cup frozen sweet corn
3/4 cup chunky salsa
1 can (15 oz) black beans
2 cups shredded Monterey Jack cheese
12 (6-inch) corn tortillas
1 (10-oz) can enchilada sauce (I prefer green, but red is fine, too!)

Spray 11 x 7-inch baking dish with cooking spray. In a 10-inch skillet, heat oil over medium heat. Add onion and cumin; cook and stir 4 to 5 minutes or until onion is tender. Stir in corn, salsa, beans, and 1 cup of the cheese. Remove from heat.

On microwaveable plate, stack tortillas and cover with paper towel. Microwave on high 1 minute to soften. Place 1/4 cup bean mixture along center of each tortilla. Roll up tightly and place seam side down in baking dish; spoon remaining bean mixture on top. Pour enchilada sauce over enchiladas, spreading to coat all tortillas. Sprinkle with remaining 1 cup of cheese.

To cook and serve now--Bake in preheated 350 degree oven 25 to 30 minutes or until cheese is melted and sauce is bubbly around edges. Garnish with toppings of your choice (olives, avocado, tomato).

To freeze and serve later--Freeze now. Do not thaw and then cook. Cover with foil and freeze. Bake from frozen in preheated 350 degree oven for 45 minutes. Remove foil and cook until cheese is melted and sauce is bubbly around edges, 10-15 minutes.

Enjoy!

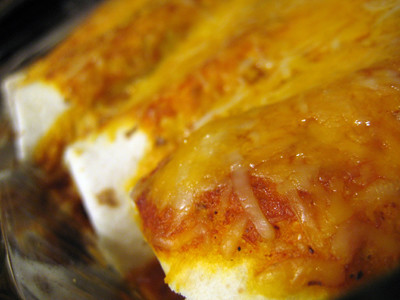
So, this is the closest I could find to a picture of black
bean enchiladas. But it isn't mine. And these aren't even
corn tortillas. But it looks good, and that's what counts,
right? ;)